I’ve always been interested in fighting games. Since Street Fighter II: World Warrior in my youth, to Guilty Gear XX #Reload, to my current favorite, Street Fighter V: Arcade Edition. I’ve spent quite some money acquiring fightsticks for the authentic arcade experience (although the nostalgic factor is a little misplaced for me as I mostly played on consoles), but I recently got bitten by the DIY bug and started refurbishing old fightsticks to make them compatible with newer systems like the PS4. Then a voice in my head spoke to me: “Why not make one from scratch?” Another voice in my head said “That way lies madness.” I ignored the latter and got to work.
Until now, most of the sticks I’ve seen or even purchased followed the at-least-2-decade-old idea of “gamer cool”. Basically, black with glowy bits. As a 30-something-year-old father, the idea seemed a little stale to me. I wanted a stick that represented me as I currently am, not the angsty teenager I used to me. So I figured the stick needed to follow a few criteria:
- Not black with glowy bits.
- Be comfortable to use.
- Tactile feedback.
- Look as crazy as the effort I was going to put into it.
The Enclosure
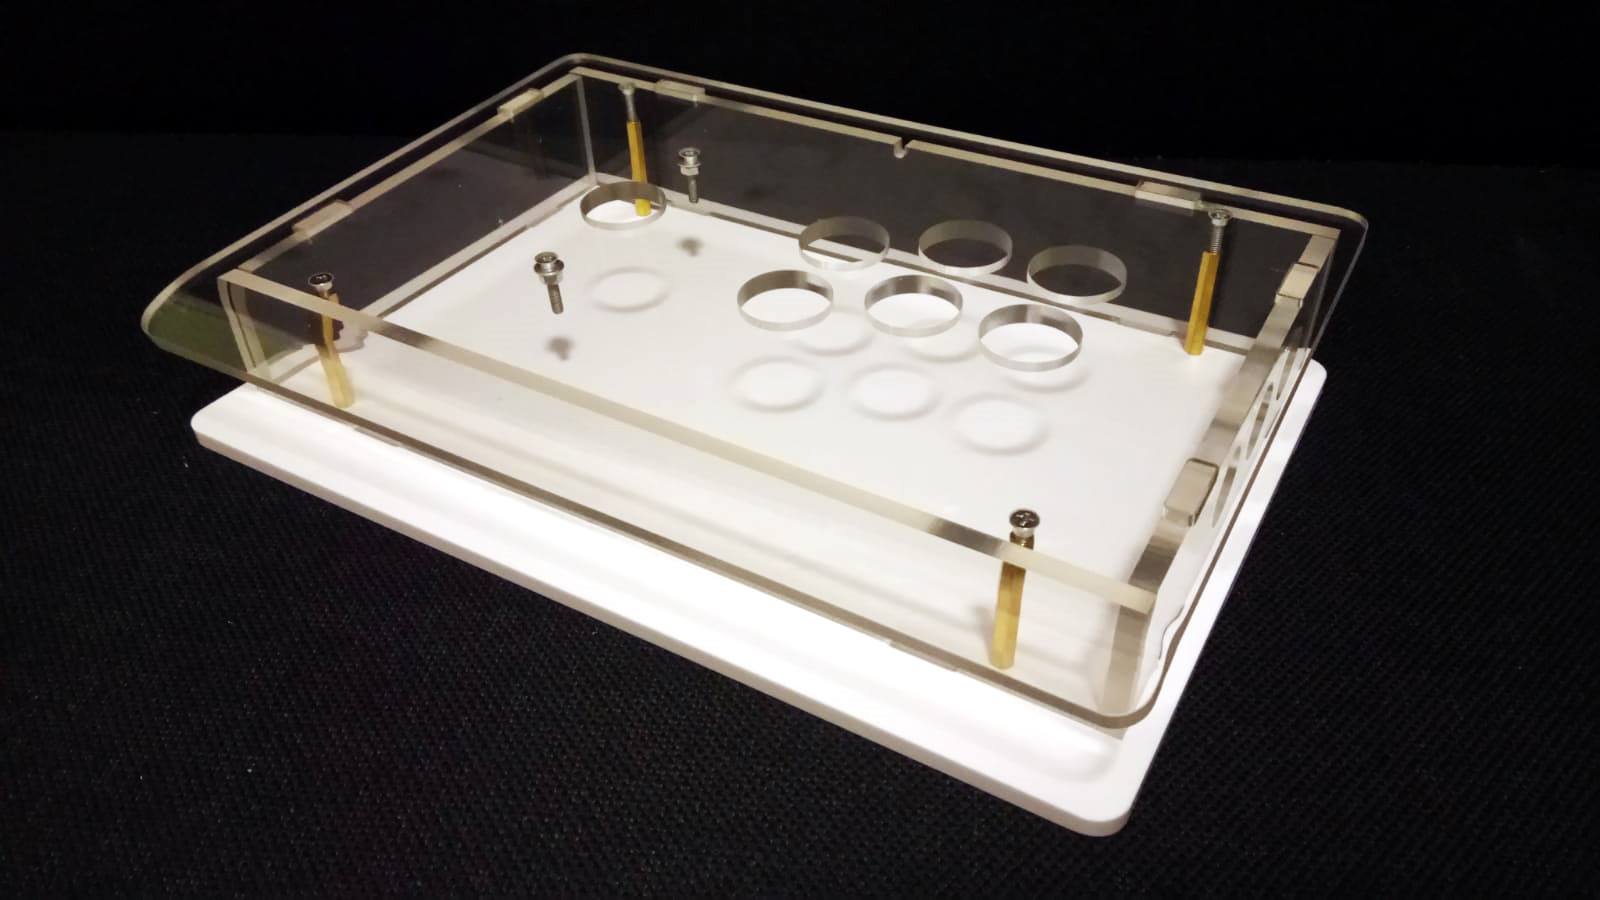
I wanted a good base to build off so I went looking for an enclosure. I was thinking of a PC case mod I saw a while ago, and I remembered myself thinking “How cool would it be to have a fightstick that followed that aesthetic?” so I started in that direction and found one on Taobao that was close to what I had in mind. Several messages in mandarin via their chat app later, the seller said he could customize the case to fit what I wanted, we settled on the price and that was it.
The Joystick
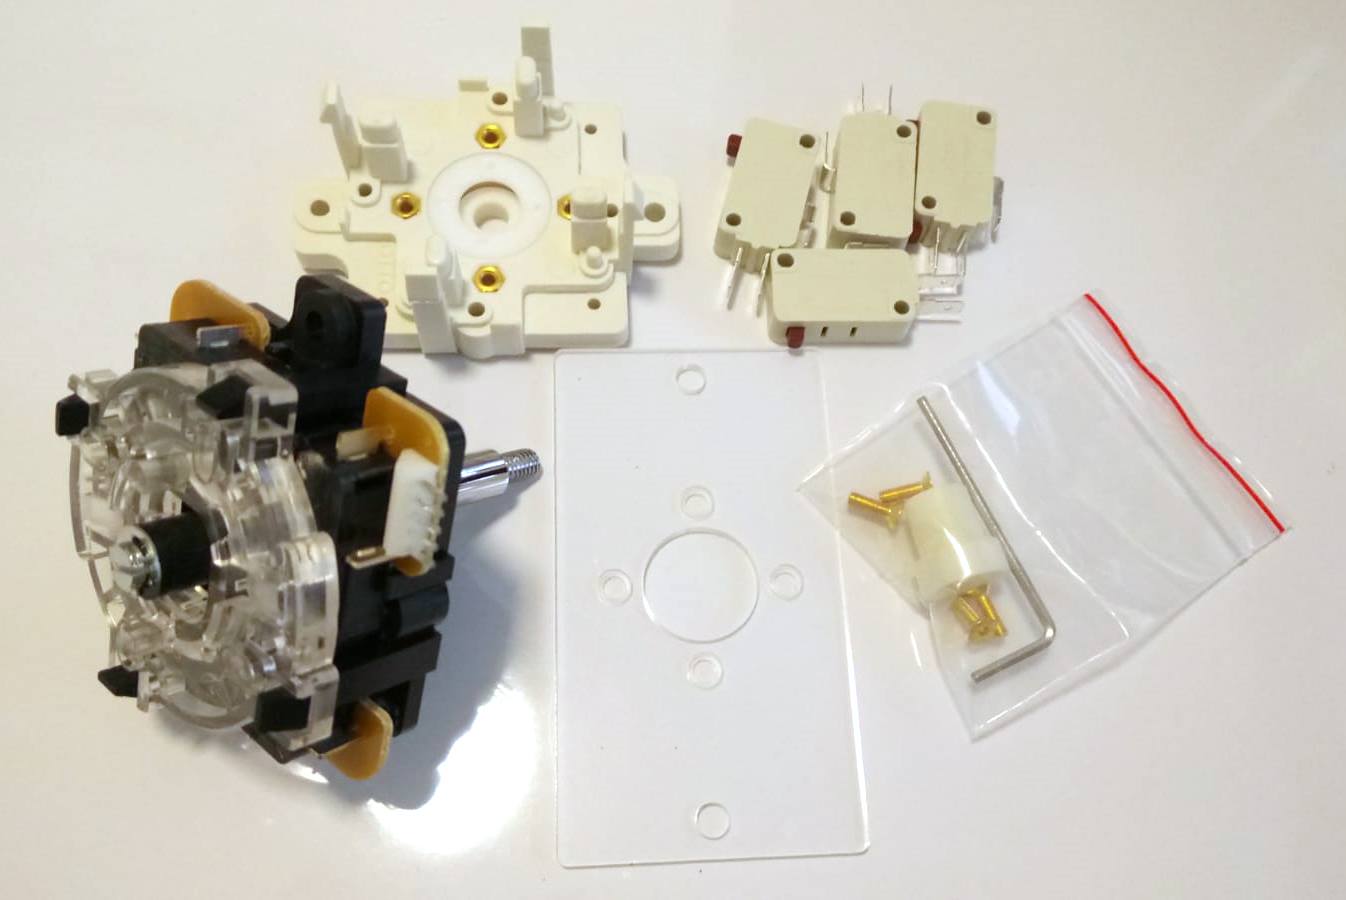
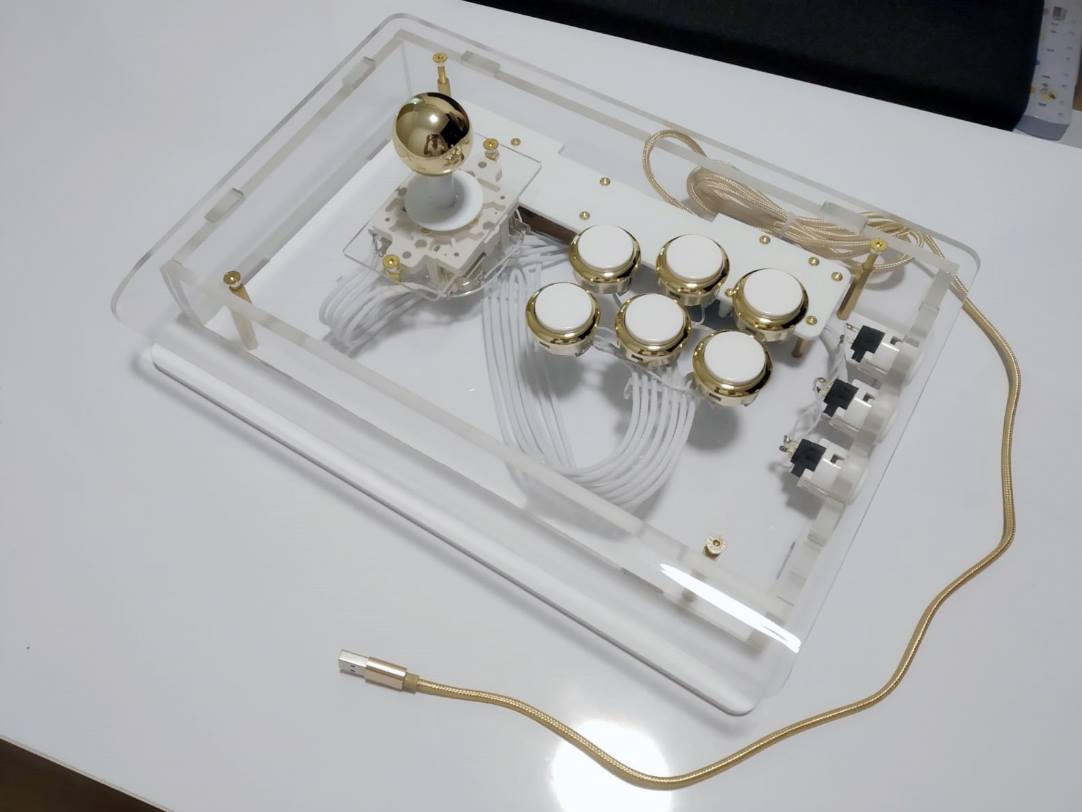
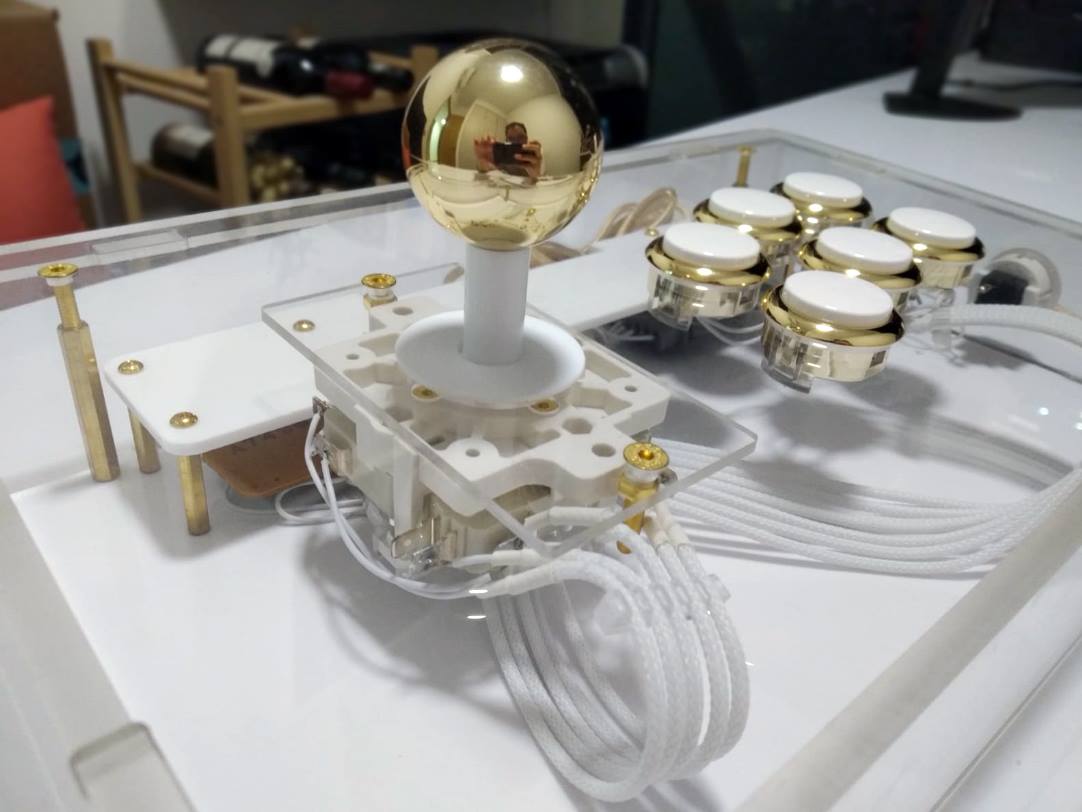
I need the stick to fit the white/gold look I had in mind, yet still have the stiffness and reliability of the Sanwa JLF. So I bought an original JLF, and looked for parts to mod it with. As luck would have it, I found another seller on Taobao selling an alternative frame for the JLF, in WHITE. Needless to say, I put down an order almost immediately. That still leaves the microswitches, which needed to be white (or white-ish) for it to complete the look - I managed to find these switches that had the right form factor and about the same activation force. Cool fact, they were originally designed for microwave oven doors.
I also wanted a clear acrylic mount for the stick so people could revel in the majesty of it and not have everything blocked by an ugly steel plate. First to come to mind was the frame offered by Tek-Innovations, but it didn’t fit the enclosure I bought, so I had one custom laser-cut. It was… not cheap. Ball-top was an original Sanwa LB-35 gold balltop, you can find it in many many stores. To finish it off I also acquired Qanba’s white shaft and dustcover set from Canadian Joysticks.
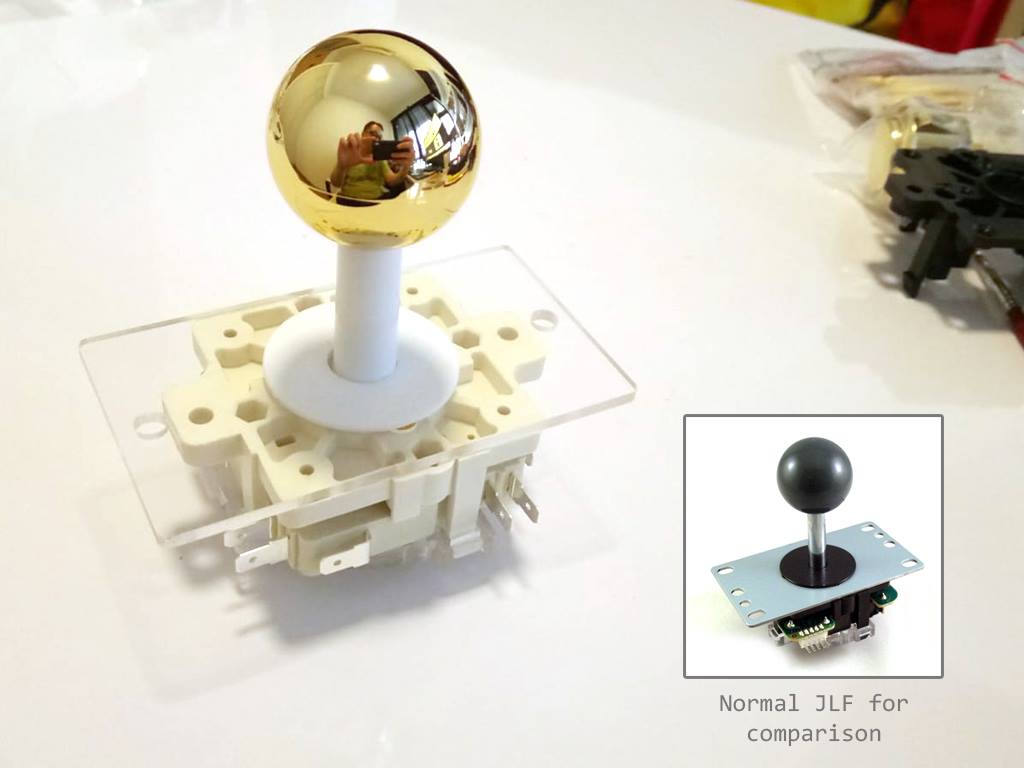
The finished sticks was everything I hoped it would be. Although I couldn’t find the exact shade of white for all the components, it was pale enough to blend together well and will meld seamlessly into the overall theme of the fightstick.
Pushbuttons
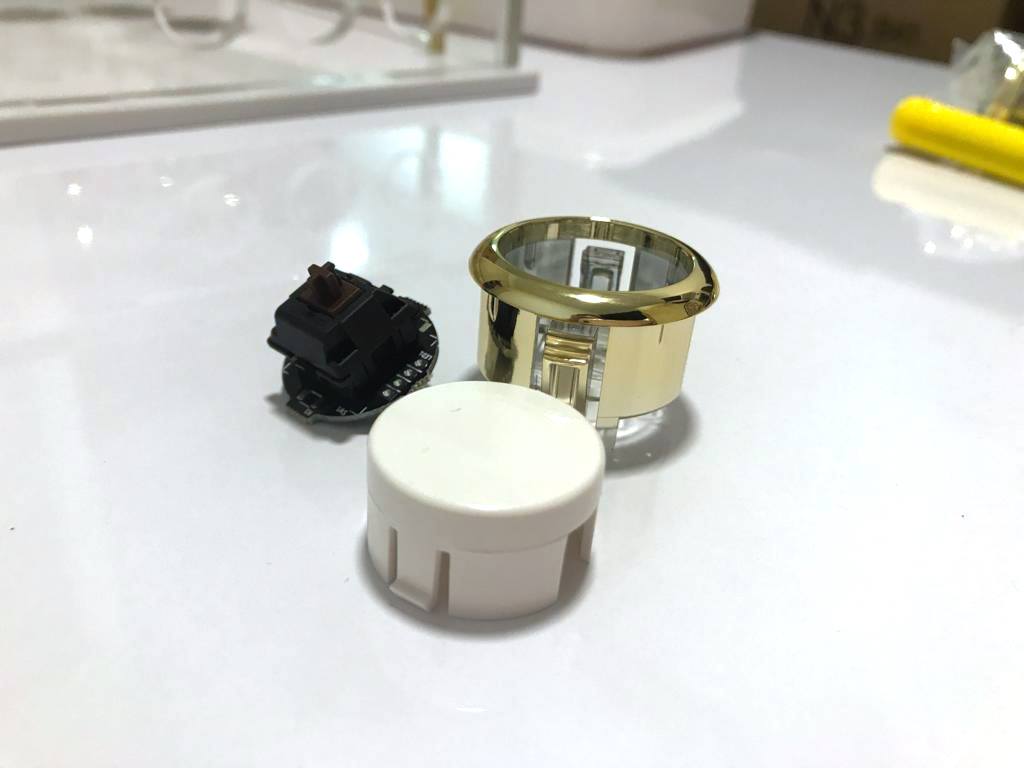
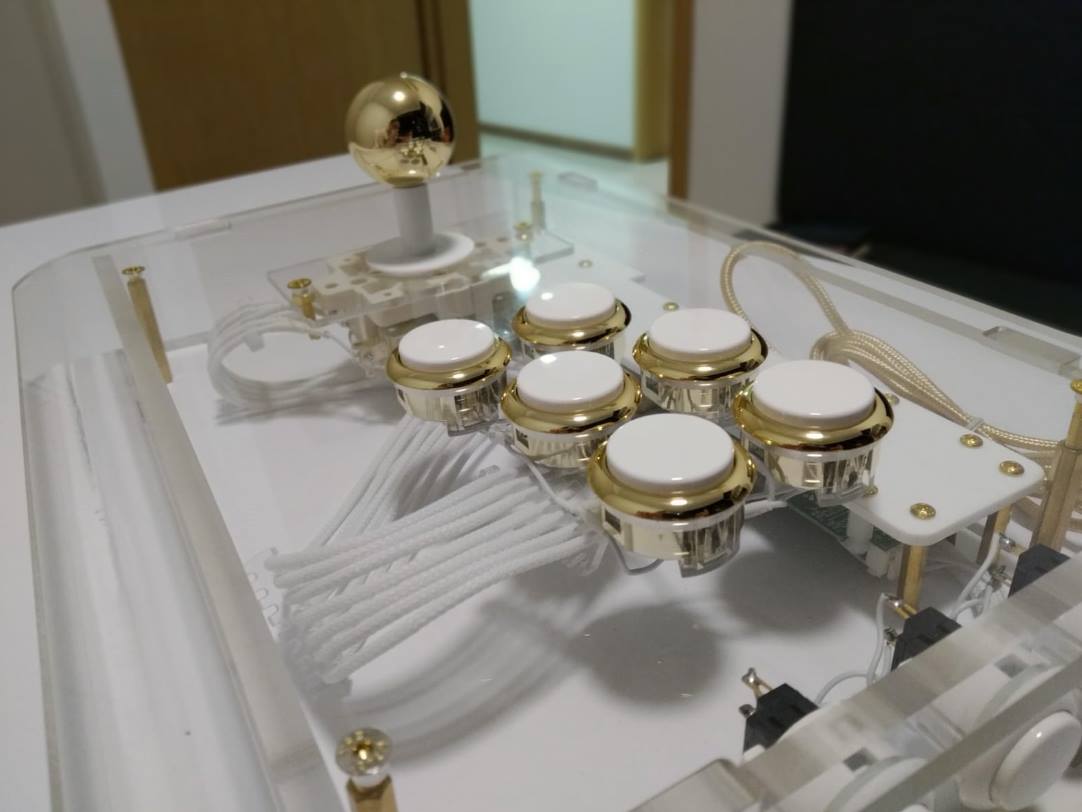
With the stick done, I went to the buttons. I knew I wanted Cherry MX Browns because I used those before in a mechancial keyboard and LOVED them. I also knew I wanted the same gold metallic finish as my ball-top so I stuck with Sanwa for the button frames, and purchased a set of OBS-MX browns from Paradise Arcade Shop. The rest of the buttons on the side panel were just stock 24mm Sanwa OBSFs.
PCB and Electricals
This one took the longest and where the most labor was invested. I was toying originally with the idea of buying a Brook Fighting Board, but I realized I had a severely underused PS1 digital (as opposed to another version with the twin analog sticks) gamepad locked away in storage.
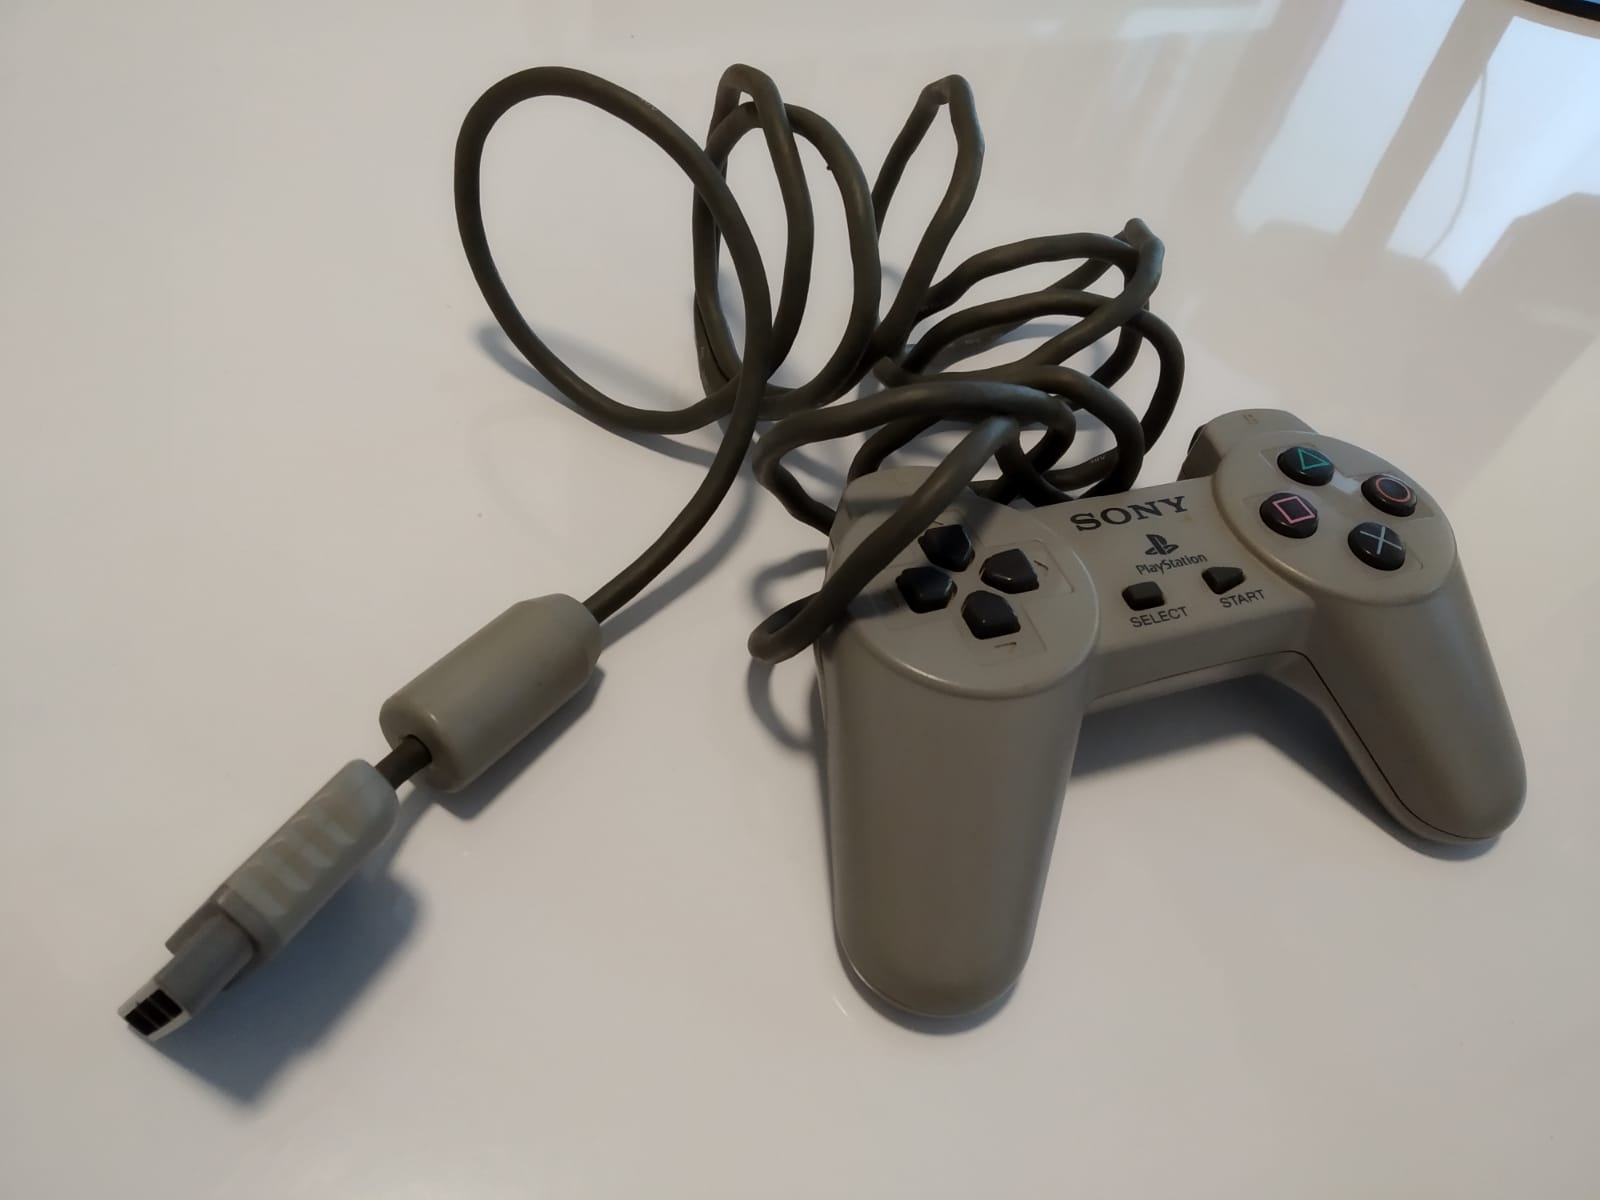
That’s probably an understatement - I hadn’t used it since 1998, which means it went untouched for over 21 years. Surprisingly it still works, and the idea of making use of such a large part of my childhood again made me very excited. It also made this part of the build more economical because I ended up buying the cheaper PS2 to PS4 Brook Super Converter instead of the fighting board.
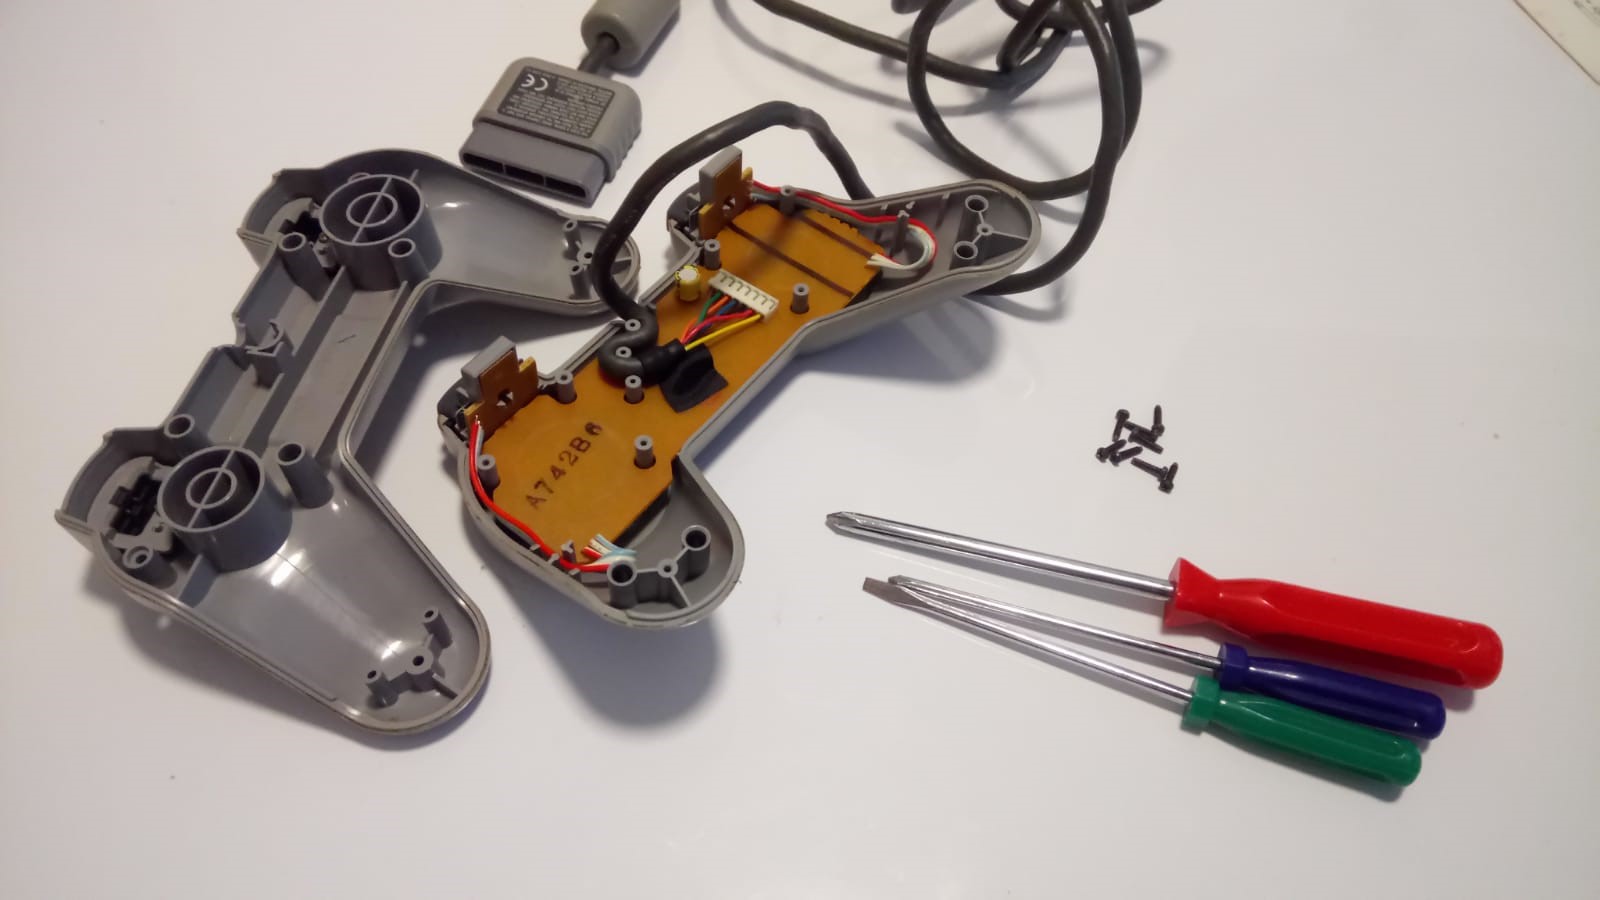

Took everything apart.
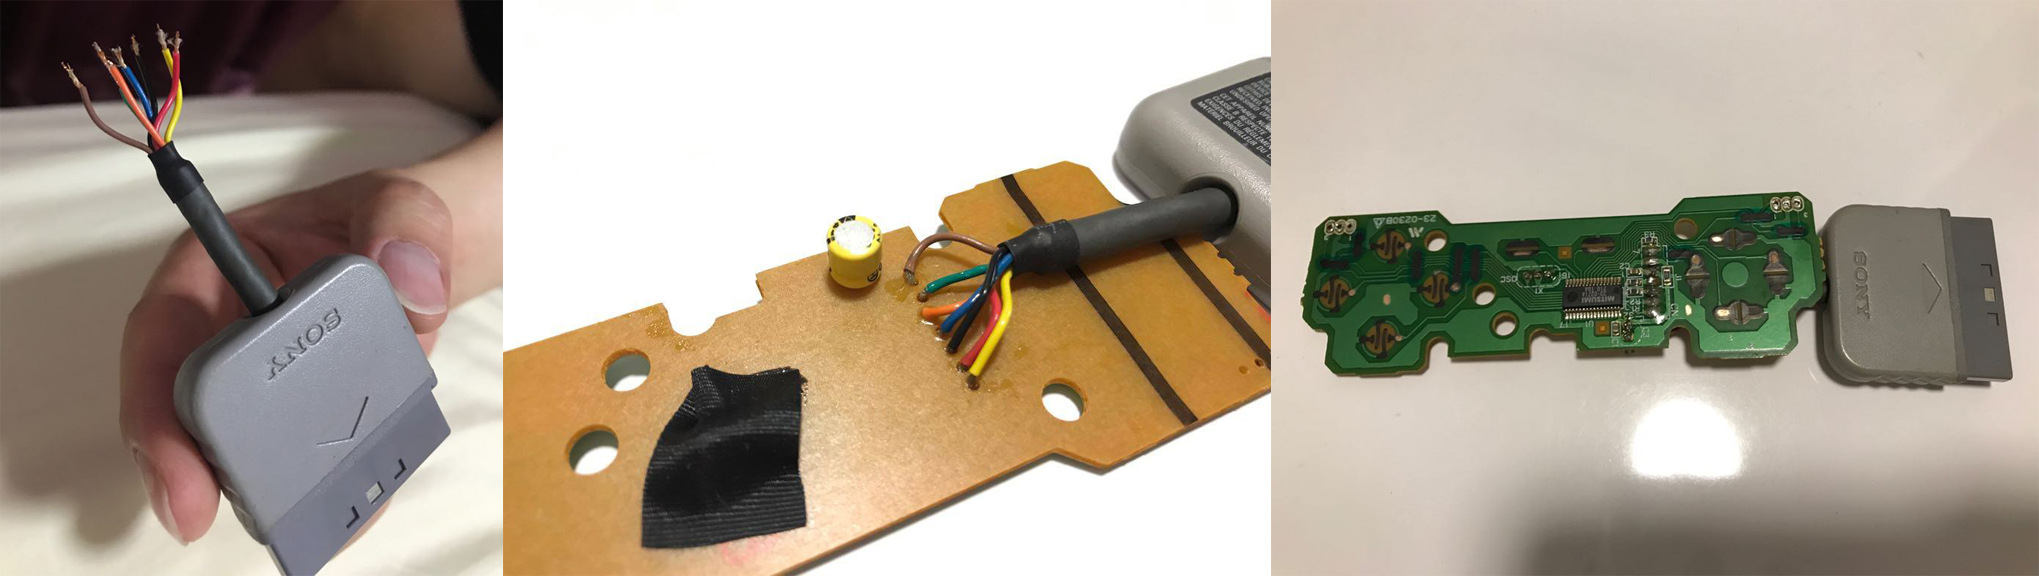
Cut the cord of the PS1 controller, shortened it, stripped the individual cables, applied heatshrink and soldered it back onto the board. Now I have a neat little package ready to attach to the adapter.
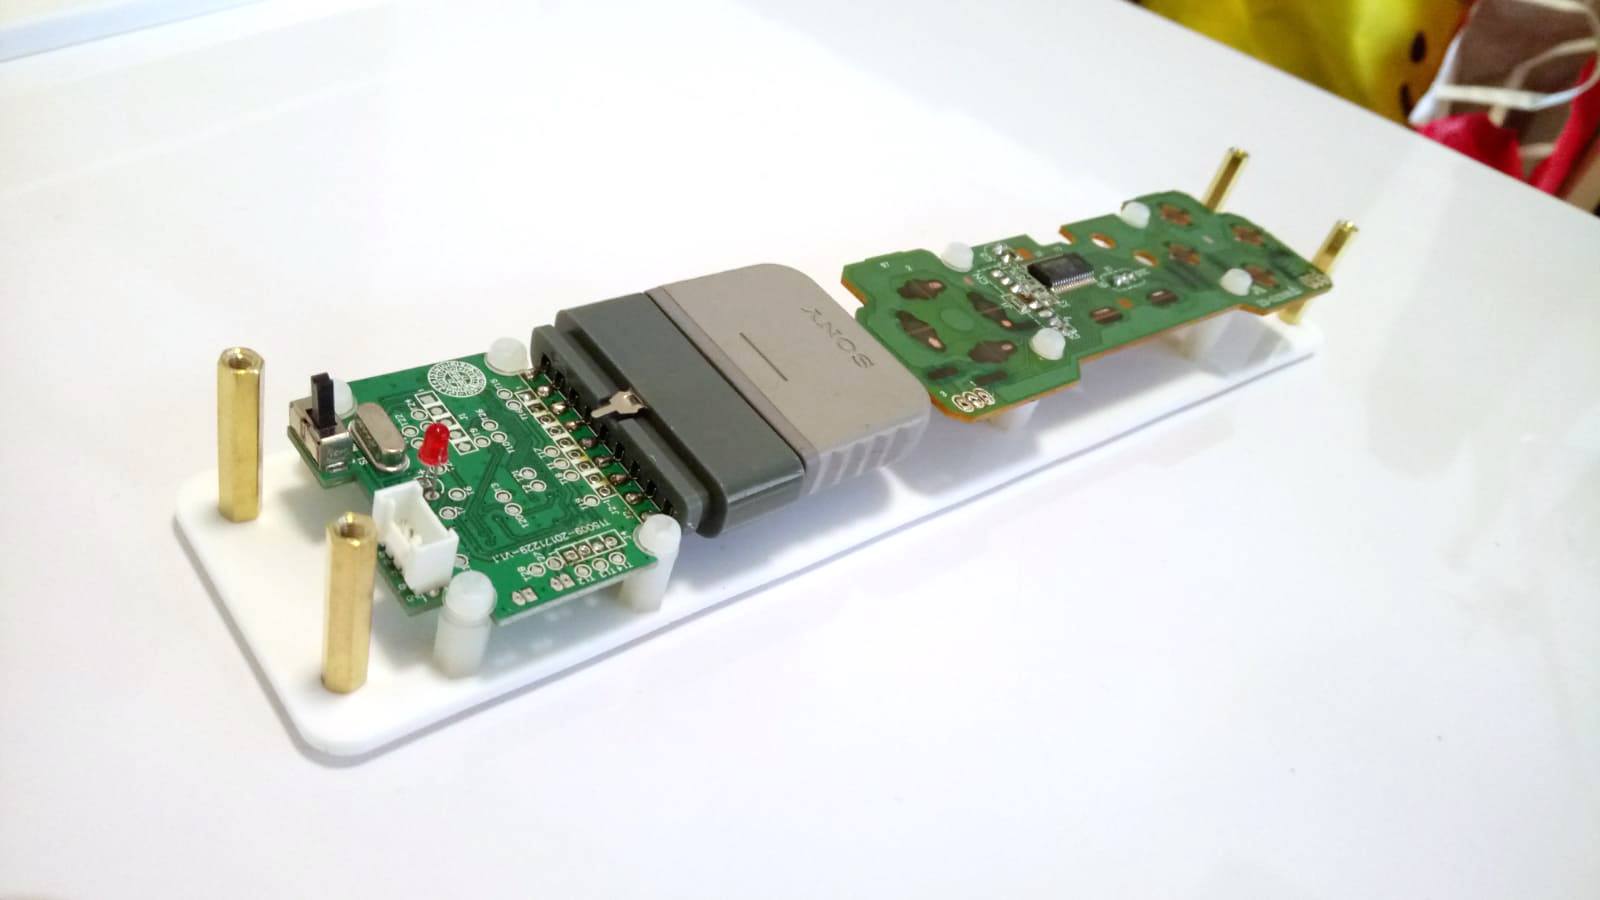
I did a few modifications to the Brook adapter as well - I replaced the usb cable that was soldered onto the board with a 4 pin socket, so I could remove/change the USB cable if I wanted to. I also removed the hardware button that was on the adapter (it will later be soldered to a 24mm OBSF button on the side of the case). I bought a custom acrylic board from Repla at a reasonable rate and mounted everything onto it. Looks very clean if I should say so myself!
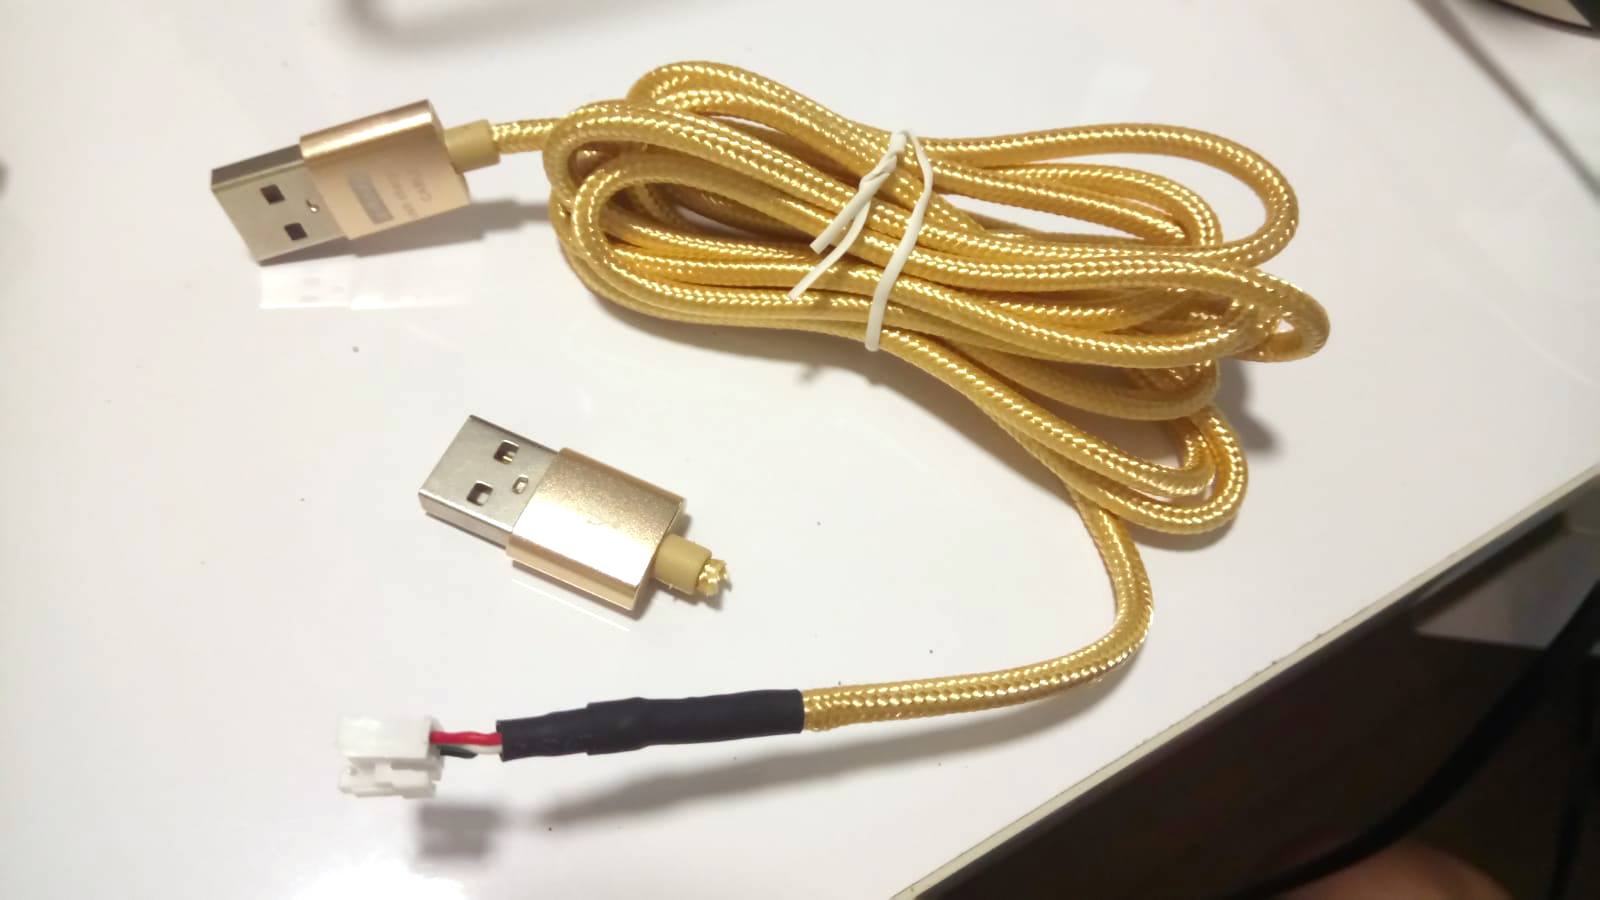
I found a golden (oooh so shiny) male-to-male USB extension cable, cut off one end and attached a 4-pin plug to it, compatible with the 4-pin socket on the adapter I showed earlier.
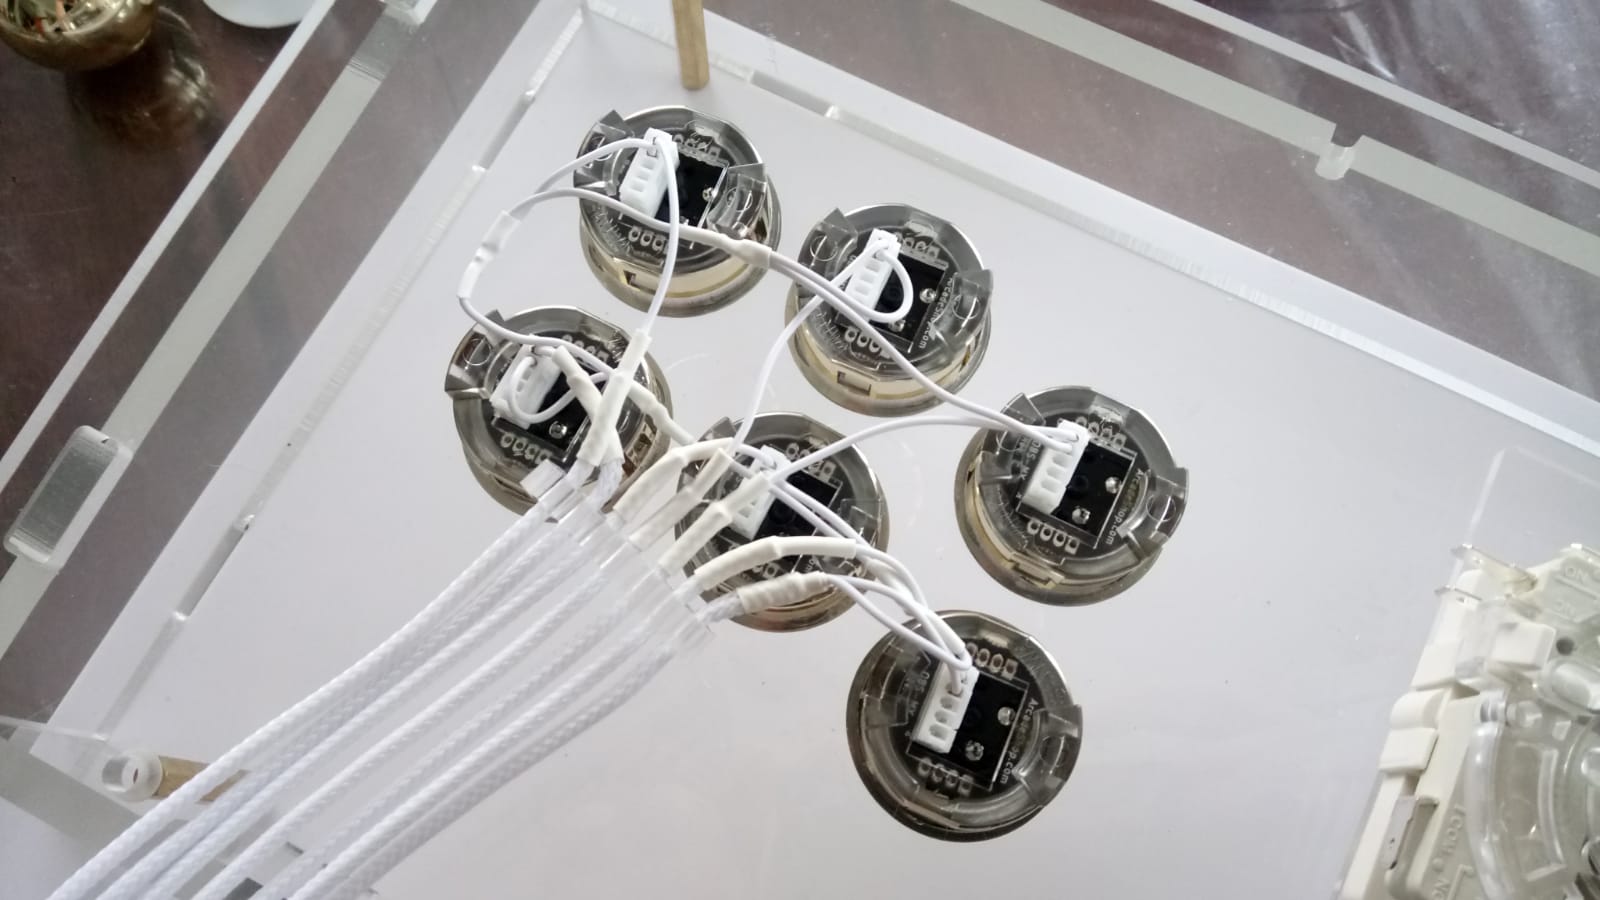
Wired up the buttons as neatly as I could - was a little more tricky because Paradise Arcade OBS-MX’es come with a 5-pin plug instead of the usual 2-pin easy-connects that are common with fightstick pushbuttons. No biggie, just need a crimping tool and a few pins from the local hardware store and voila. Ground wires are connected using a daisy chain for neatness and spliced together using the Y-splices (you can read more about it in this article). Sleeves (bought here) and heatshrink are then applied to the cables. I’m not going to go into too much detail on how to do this because it’s been covered extensively on PC modding sites like this and this.
I forgot to take photos of the joystick wiring (so sorry about that!), but suffice to say there isn’t THAT much difference compared to the push buttons. If anything, it was much easier because of the larger electrical contacts.
Finished Stick
After about a month of work on the stick, it’s finally finished. I can’t thank my buddy Dom “Madscuzzy” Chan enough for his help on this (You might know him from his INCREDIBLE Orktimus Prime 40K conversion). His tools and expertise in building just about anything is unimaginably helpful on this project. Without further ado, on to the pics!